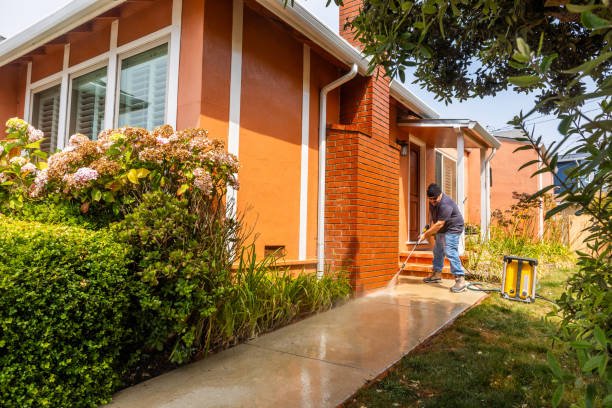
Maintaining a pristine exterior is not just about aesthetics; it’s a crucial aspect of preserving your home’s integrity and value. Residential pressure washing stands out as a powerful solution for combating the gradual accumulation of dirt, grime, and mold on your home’s surfaces. In this comprehensive guide, we will delve into the tips and techniques that transform pressure washing into a formidable tool for enhancing your home’s curb appeal and longevity.
I. Understanding the Basics of Residential Pressure Washing
Before diving into the intricacies of pressure washing, it’s essential to grasp the fundamentals. Pressure washing employs high-pressure water streams to remove dirt, stains, and contaminants from various surfaces. The equipment typically consists of a pressure washer unit, which can be powered by electricity or gas, and a nozzle that controls the intensity and pattern of the water spray.
II. Choosing the Right Pressure Washer
Selecting the appropriate pressure washer for your residential needs is paramount. Gas-powered pressure washers deliver higher pressure and are ideal for large outdoor spaces, while electric models are more suitable for smaller areas. Consider the PSI (pounds per square inch) and GPM (gallons per minute) ratings to ensure the machine’s power aligns with your specific requirements.
III. Safety First: Protective Gear and Precautions
Operating a pressure washer requires diligence to ensure both effective cleaning and personal safety. Always wear protective gear, including safety glasses, gloves, and closed-toe shoes, to shield yourself from the high-pressure water and potential debris. Additionally, be mindful of your surroundings, securing loose items, and protecting delicate plants before starting the pressure washing process.
IV. Preparing Surfaces for Pressure Washing
Effective preparation sets the stage for successful pressure washing. Begin by removing loose debris, such as leaves and cobwebs, using a broom or a leaf blower. For surfaces with mold or mildew, applying a specialized cleaner beforehand can enhance the effectiveness of the pressure washing process.
V. Mastering Pressure Washing Techniques
A. Maintaining the Right Distance:
Hold the pressure washer nozzle at an angle and maintain a consistent distance of 6 to 12 inches from the surface. This ensures optimal pressure without causing damage.
B. Working in Sections:
Divide larger areas into manageable sections, focusing on one area at a time. This systematic approach ensures thorough cleaning without overlooking any spots.
C. Applying the Correct Pressure:
Adjust the pressure settings based on the surface you are cleaning. High pressure may be suitable for concrete driveways, but it can damage softer surfaces like wood or vinyl siding
D. Following a Top-Down Approach:
Start from the top and work your way down. This prevents dirt and debris from flowing onto already cleaned areas.
VI. Targeted Tips for Specific Surfaces
A. Brick and Concrete:
Stubborn stains on brick or concrete surfaces may require a higher pressure setting. Utilize a rotating or turbo nozzle for increased cleaning power.
B. Wooden Surfaces:
Exercise caution when pressure washing wood to avoid damage. Use a lower pressure setting, and a wide-angle nozzle, and maintain a greater distance from the surface.
C. Vinyl Siding:
Clean vinyl siding with a lower pressure setting and a wider spray pattern to prevent damage to the material. Angle the nozzle downward to avoid forcing water behind the siding.
VII. Dealing with Mold and Mildew
Mold and mildew are common challenges in residential settings, particularly in damp or shaded areas. Opt for a cleaning solution specifically designed to combat these issues, and allow it to sit for a few minutes before pressure washing. This two-step process ensures a more effective removal of these persistent contaminants.
VIII. Post-Pressure Washing Care
Once the pressure washing is complete, there are essential steps to ensure a seamless finish and long-lasting results:
A. Inspect for Damage:
Evaluate the cleaned surfaces for any signs of damage or wear. Address any issues promptly to prevent further deterioration.
B. Sealing and Protecting:
Consider applying a protective sealant to surfaces like concrete or wood after pressure washing. This adds an extra layer of defense against future stains and damage.
C. Gutter Maintenance:
Check and clean gutters after pressure washing to remove any debris that may have accumulated during the process.
IX. Regular Maintenance for Lasting Results
Consistency is key in preserving the benefits of residential pressure washing. Establish a regular maintenance schedule, especially in areas prone to rapid dirt accumulation or adverse weather conditions. Periodic cleaning not only enhances your home’s appearance but also safeguards its structural integrity.
X. Professional Assistance when Needed
While many homeowners can handle routine pressure washing tasks, some situations may require professional expertise. If you encounter challenging stains, intricate surfaces, or simply lack the time and equipment, enlisting the services of a reputable pressure washing professional can ensure optimal results without compromising your home’s well-being.
Conclusion
Mastering the art of residential pressure washing involves a combination of understanding the equipment, employing effective techniques, and prioritizing safety. By incorporating these tips into your maintenance routine, you can elevate your home’s curb appeal and contribute to its long-term resilience against the elements.

